
6 min read
1026 words
Some vehicle maintenance and repair tasks are not as challenging as you might think. There are several important points to remember about doing work on your Toyota, or any other vehicle. Firstly, you should make sure you follow the right steps to get the work completed properly and safely. Secondly, it is essential that you choose genuine Toyota auto parts so you know they meet the right standards and will last.
Let’s take a specific look at replacing the brake pads on your Toyota. This is a popular DIY task that you can undertake successfully if you follow this step-by-step guide.
Here’s what you need to know and what to do to replace your vehicle’s brake pads.

Prepare the area and your car for repair work
Creating a safe working environment to work on your car, and preparing your Toyota for working on it, are essential first steps that should be considered essential.
You will need to have the tools you will need to hand, including your replacement Toyota brake pads, ready to install once you have removed the old ones. It is well worth emphasizing at this point that you should always use genuine replacement auto parts, especially something as important as brake pads.
You might potentially find some brake pads that are cheaper, but would you really want to rely on poor quality replacement pads to perform properly every time and last you for a long time? Buying cheap replacement parts is a false economy and could even be a dangerous strategy. You also know that genuine parts will fit perfectly every time.
Once you have your genuine replacement brake pads to hand you need to prepare your car for working on.
As you are replacing brake pads, you will need to raise your car off the ground and secure it safely in a suspended position using a car jack. Before you raise the car off the ground, loosen the lug nuts on the wheels where you will be replacing the brake pads.Once you have done that, raise the car with the jack and make sure it is suspended securely.
Once you are happy that the car is suspended safely and securely you can remove the loosened lug nuts and take the tire away so that you have access to the brake pads.
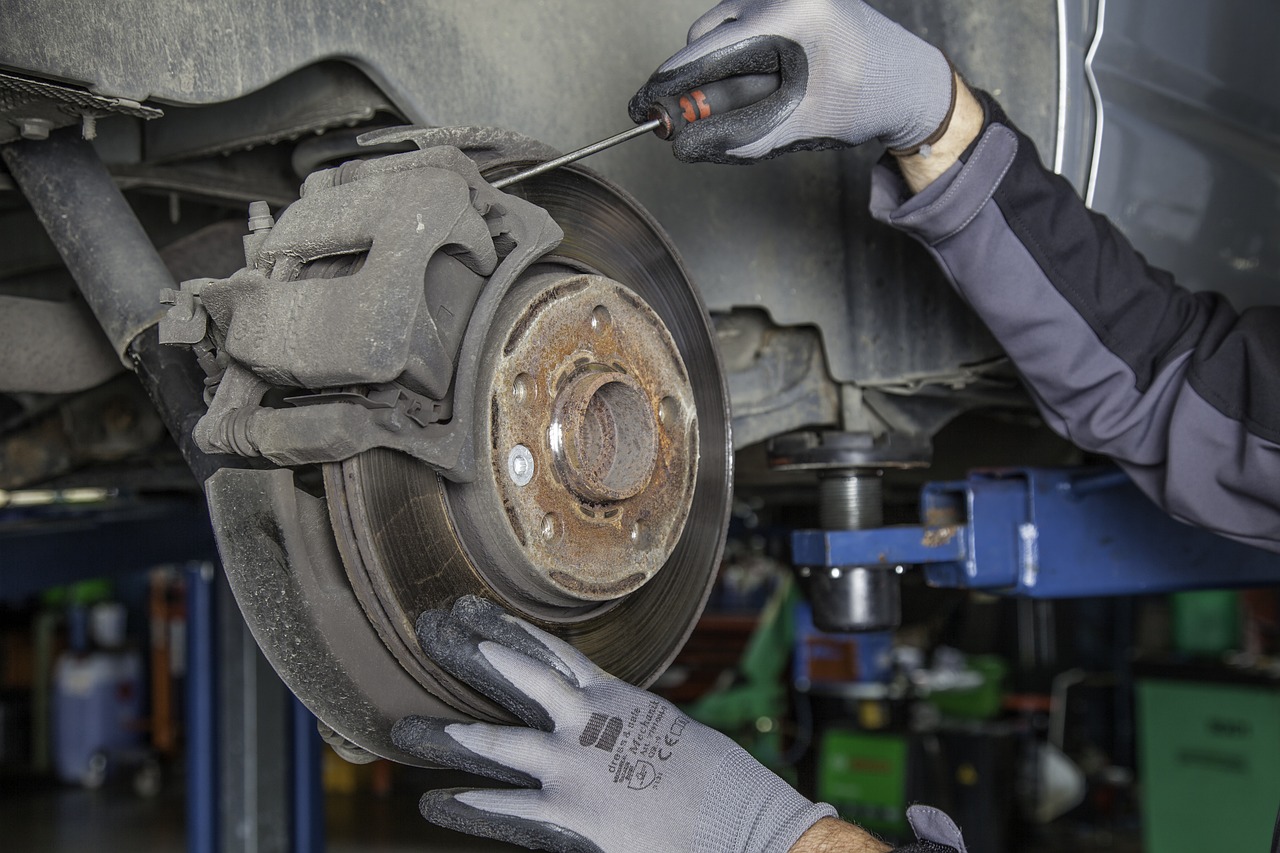
Removing the caliper assembly is your next step
Now that your wheels are removed and you can see the brake mechanism you should be able to view and access the rotors and brake calipers. This caliper assembly is very much like a clamp, and looks like one too. They work by forcing the brake pads against the rotors when you press your brake pedal to slow down.
It helps to understand the mechanics of this process so that you know what the caliper assembly looks like and works when you put it back together.
To remove the caliper assembly and get access to the brake pads you’re replacing, you should use a socket wrench to take off the bolts at the back of the caliper assembly so that you can slide the unit off the rotor.
It is really important to remember that the unit will still be attached to the brake line. You should not leave it hanging as it could damage the brake line. Instead, rest it safely on top of the rotor before sliding or popping out the old brake pads.
Installing new brake pads
Once you removed the old brake pads and ensured that the caliper assembly is resting safely without damaging the brake line, it’s time to install your replacement Toyota brake pads.
Make sure you apply some grease to the back of the new brake pads, but do not get any of this grease on the front of the pads. The reason for doing this is that it helps to reduce any squeaking noise when you brake. This can happen when the caliper piston applies pressure to the back of your brake pad. A small amount of grease on the rear should help reduce the prospect of this happening.
Finish this step by pressing the new brake pad into the same position where the old one was lodged.
Replace and adjust your caliper assembly
It’s time to put your caliper assembly back now that you have replaced your brake pads. One thing that will become immediately obvious is that it doesn’t want to fit snugly on top of the new brake pads. This is because the piston in the assembly has auto-adjusted to accommodate the smaller width of your worn-down brake pads.
You will need a brake tool to rectify this issue and get your caliper assembly and new brake pads aligned properly. Start by placing one of your used brake pads in the assembly so that it is positioned against the large circular piston. Using the wide piece of the plastic brake tool, position it against the opposite side of the caliper. Next, turn the handle of your brake tool until the piston has become fully compressed. This will ensure that you now get a good fit.
Finishing up
Now that your replacement brake pads are installed and fully aligned you can put the tire back on the car and tighten the lug nuts by hand to secure the wheel before dropping the car back down to the ground using the jack.
Once the car is back on the ground you can then fully tighten the wheel nuts so that they are fully secure.
Replacing your brake pads can be straightforward, as long as you have the right tools and use genuine replacement parts. It is a good idea to read or watch some tutorials if there are any steps you are not sure about.
Alternatively, you could always use a certified technician to do the job for you. If you go to a Toyota service center, for instance, you will know that they are using genuine Toyota spares, which is what you should be doing if you do decide to do the job yourself.