
5 min read
879 words
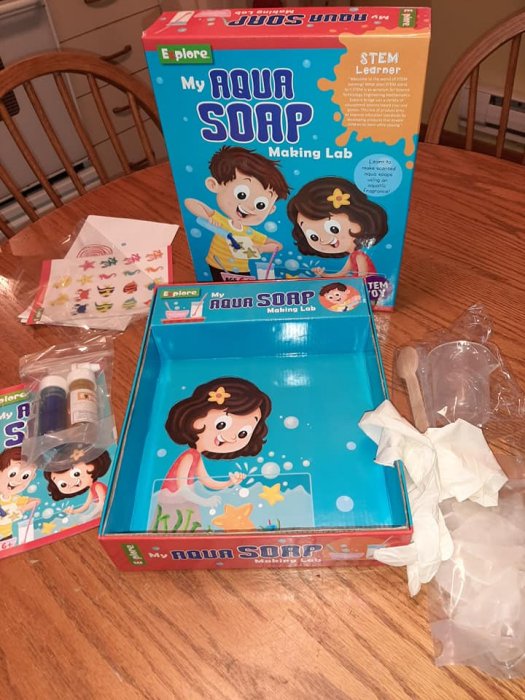
Are you searching for fun, hands-on activities that sneak in a bit of learning? Finding a genuinely engaging STEM kit for kids can be tricky, but we recently tested a fantastic project that brings chemistry, math, and history right into your kitchen: the My Aqua Soap Making Lab from Explore. This kit isn’t just about making cute soaps; it’s a brilliant introduction to the science behind everyday products. Grab your lab coats (or aprons!)—here is our detailed review.
Discovering the Science of Suds
The My Aqua Soap Making Lab is designed to teach children the basics of chemistry and measurement through the exciting process of creating their own custom soap bars. It provides a safe, non-toxic environment for young scientists to experiment and see the results of chemical reactions firsthand.
What’s Inside the My Aqua Soap Making Lab Kit?
Explore provides everything your child needs to start their soap-making journey immediately. The organization and quality of the components make this kids soap making kit highly recommendable.
| Component | Purpose |
|---|---|
| Soap Base | The foundation for the soap bars. |
| Star Mold | A fun shape for finished soaps. |
| Coloring Bottles (2) | For customizing the look of the soap. |
| Aquatic Perfume | Adds a lovely fragrance. |
| Measuring Cup & Droppers | Essential tools for precision and math. |
| Gloves & Wooden Spoons | Safety and mixing tools. |
| Plastic Wrap & Stickers | For wrapping and gifting the finished product! |
More Than Just Soap: The Educational Booklet
One of the standout features of this kit is the included 15-page educational booklet. This guide elevates the activity beyond simple crafting by connecting the process to real-world knowledge.
The booklet covers essential topics such as:
- The proper use of chemicals (safe handling).
- The importance of measurements and mathematics.
- The fascinating history of soaps.
- Complete, easy-to-follow instructions.
This makes the Aqua Soap Making Lab an excellent choice for parents and educators looking for a robust, educational toy that fits seamlessly into a homeschool curriculum or weekend STEM project.
Our Hands-On Review: Making Aqua Soap
We spent a fun afternoon testing this kit with my daughter, Miss P. We wanted to see how easy the steps were for a child and if the final product lived up to the hype.
Ease of Use & Supervision
While heating the soap base requires careful adult supervision (due to the microwave step) and the final pouring needs steady hands, we were delighted to find that Miss P handled most of the activity by herself! The instructions were clear, and the included tools were perfectly sized for children.
Our takeaway: This is a highly independent activity for older children (with initial guidance) and a fantastic bonding project for younger kids.
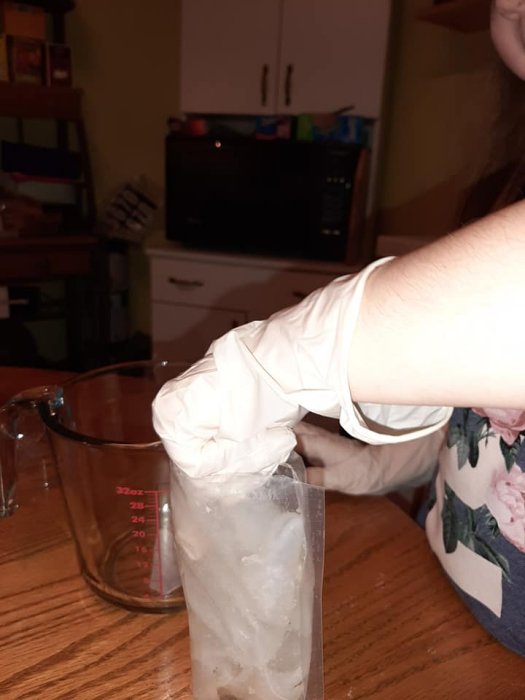
The Melting and Setting Process
The instructions suggest heating the soap base in increments. We used the included measuring beaker (though a large glass measuring cup works well, too!).
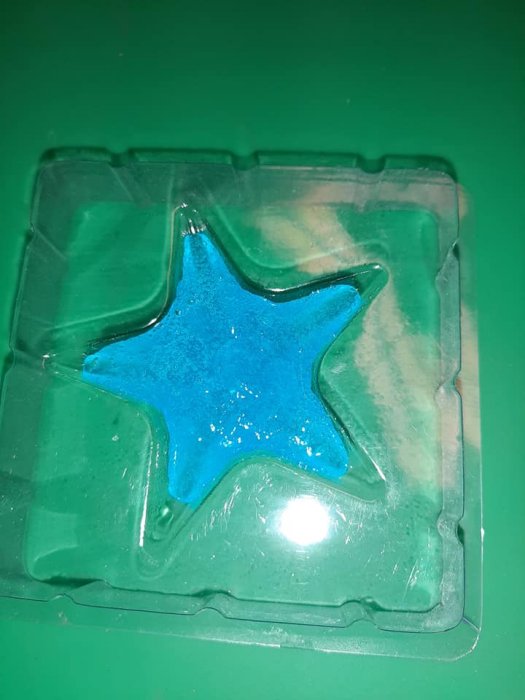
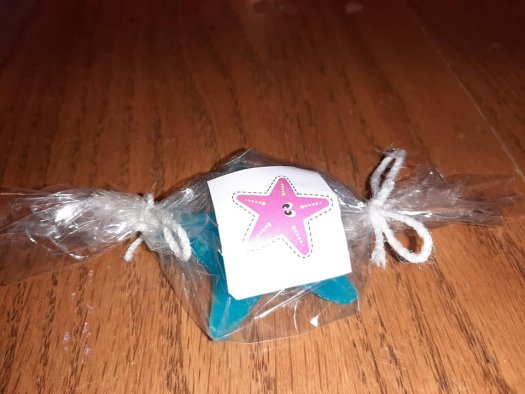
The set time is officially listed as four hours, but we found that our soaps set in even less time! This means less waiting for excited little scientists. Taking the soap out of the star molds was surprisingly easy, and Miss P’s colorful soaps turned out perfectly smooth and ready to use. Overall, this was lots of fun, and we now have a lovely new bar of aromatic soap for the bathroom!
Step-by-Step: Aqua Soap Making Instructions
Ready to make your own custom soap? Here is the simple process we followed:
- Measure the Base: Place three pieces of the soap base into the included measuring beaker.
- Initial Melt: Place the cup into the microwave and heat for 20 seconds.
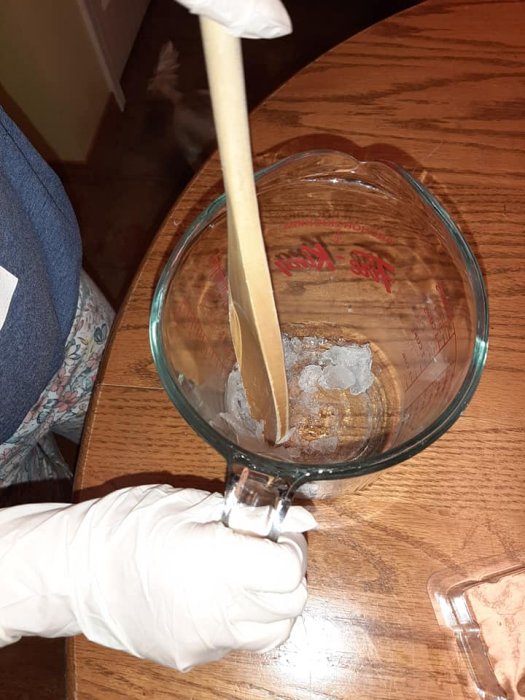
- Stir: Remove and stir the semi-melted soap.
- Final Melt: Return to the microwave and heat for 5 more minutes until fully liquid.
- Color: Give it another stir and quickly add your cosmetic coloring, stirring to ensure the color is fully mixed.
- Fragrance: Add five drops of the aquatic fragrance to the mixture and stir well.
- Pour: Carefully pour the soap mixture into the star mold until the mold is filled. (Adult assistance required for heating and careful pouring).
- Wait: Let the mixture stand and set for approximately 4 hours (though yours may set faster!).
Take Creativity to the Next Level
The basic kit provides a great result, but the fun doesn’t stop there! Once your child masters the core recipe, they can start experimenting with their own all-natural ingredients to create unique, personalized bars.
Get creative by adding:
- Green tea for a fresh scent and gentle texture.
- Oatmeal for exfoliation.
- Dried rose petals or lavender buds (ensure they are finely chopped and dried thoroughly).
This opens up another level of learning about botany and natural ingredients!
Final Verdict: Why the My Aqua Soap Making Lab is a Winner
If you are looking for an educational, engaging, and fun project, the My Aqua Soap Making Lab is an exceptional choice. It seamlessly blends chemistry and crafting, making a technical subject approachable for young minds.
Whether you’re shopping for girls or boys, this DIY soap making kit makes a perfect gift for birthdays or holidays. Who knows—this fun introduction to chemistry may just lead to a lifelong passion, or perhaps even a future soap-making business!
Explore Kids makes a number of excellent science kits that allow children to learn about complex scientific matters in a low-pressure, fun, and highly practical way.
This would be a fun activity to do with my girls. I will have to check it out. Is it available via Amazon?
This would be a lot of fun to make
I’d love to do that.
This would be so much fun to make with the grandkids !
If microwave not available how to melt soap base
Please suggest
You could melt them on the stove.
You could melt them by placing them in a cup and placing that cup in hot water.