
8 min read
1464 words
Remember those cherished voice memos, your favorite mixtapes, or even the sound of your children’s first words captured on audio tape? In today’s digital age, these precious audio memories are at risk. Analog formats like cassette tapes can degrade over time, and the devices to play them are becoming increasingly rare. The good news? You can preserve these irreplaceable moments for generations to come by learning how to convert audio tape to MP3.
MP3 is the universal standard for digital audio, offering high quality and universal compatibility with virtually any device, from your smartphone and computer to smart speakers and cloud storage. In this comprehensive guide, we’ll walk you through everything you need to know to successfully convert audio tape to MP3, making these old recordings accessible and enjoyable once again.
Why Convert My Audio Tapes to MP3?
The benefits of digitizing your audio tapes are numerous:
- Preservation: Analog tapes are susceptible to wear and tear, magnetic degradation, and physical damage. Converting them to MP3 creates a stable digital backup that won’t fade or deteriorate.
- Accessibility: Finding working cassette players can be a challenge. MP3s can be played on any modern device, allowing you to listen to your audio anytime, anywhere.
- Shareability: Easily share your old recordings with family and friends via email, messaging apps, or social media.
- Organization: Digital files are far easier to organize, tag, and search than physical tapes.
- Enhanced Listening: With digital audio, you can edit out unwanted noise, normalize volume levels, and even enhance the sound quality.
What You’ll Need to Convert Audio Tape to MP3
Fortunately, converting your audio tapes to MP3 doesn’t require a professional studio. You likely have most of the necessary components already. Here’s what you’ll need:
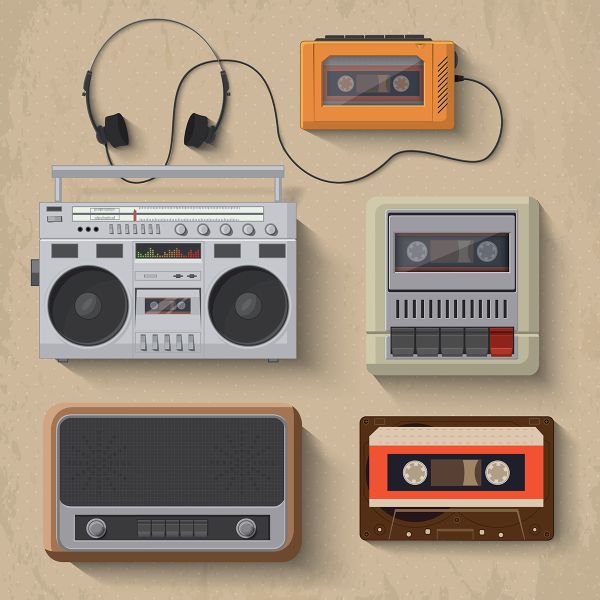
- A Working Cassette Player: This is your primary playback device. It can be a standalone cassette player, a boombox with a cassette deck, or even an old Walkman. Ensure it’s in good working order, as a faulty player can damage your tapes or produce poor-quality recordings.
- A Computer: A desktop or laptop computer will serve as your recording and editing hub.
- An Audio Cable: You’ll need a way to connect your cassette player’s audio output (usually a headphone jack or RCA outputs) to your computer’s audio input.
- 3.5mm Stereo Audio Cable: If your cassette player has a headphone jack and your computer has a microphone or line-in port, a 3.5mm to 3.5mm stereo audio cable is ideal.
- RCA to 3.5mm Stereo Audio Cable: If your cassette player has RCA outputs (red and white jacks), you’ll need an RCA to 3.5mm cable to connect to your computer’s input.
- Audio Recording Software: This software captures the audio from your cassette player and saves it as a digital file. There are many free and paid options available:
- Audacity (Free): A powerful, open-source, and widely recommended audio editor and recorder for Windows, macOS, and Linux. It’s user-friendly and packed with features.
- GarageBand (Free on macOS): If you’re a Mac user, GarageBand offers an intuitive interface for recording and editing audio.
- Windows Voice Recorder (Built-in to Windows): A very basic option for simple recordings, but lacks editing capabilities.
- Online Tape to MP3 Converters: While convenient for a few tapes, these often require you to mail in your tapes, and the quality and reliability can vary. For home conversion, software is generally preferred.
- Optional: A USB Cassette Converter: These devices combine a cassette player and a USB audio interface into one unit. They plug directly into your computer via USB and often come bundled with their own recording software, simplifying the process. This is a great option if you don’t have a working cassette player or want a more integrated solution.
Step-by-Step Guide: Convert Audio Tape to MP3
Once you have your gear ready, follow these steps to convert audio tape to MP3:
Step 1: Connect Your Cassette Player to Your Computer
- Using Audio Cables:
- Plug one end of your chosen audio cable into the audio output (headphone or RCA) of your cassette player.
- Plug the other end into the appropriate audio input on your computer. This is typically a microphone jack (often pink) or a line-in jack (often blue). For best results, use the line-in jack if available, as it provides a cleaner signal.
- Using a USB Cassette Converter:
- Simply plug the USB cassette converter into a USB port on your computer. Follow any installation instructions for the accompanying software or drivers.
Step 2: Prepare Your Cassette Player and Computer
- Cassette Player: Insert the audio tape you want to convert. Fast-forward or rewind to the beginning of the audio you wish to record. Set the volume on the cassette player to a comfortable listening level – not too loud to avoid distortion, and not too quiet to ensure a strong signal.
- Computer Settings:
- Windows: Go to
Sound Settings>Inputand select the correct input device (e.g., “Microphone (Realtek High Definition Audio)” or the name of your USB converter). You may need to go intoSound Control Panel>Recordingtab and ensure your chosen input is enabled and set as the default. Adjust the input volume as needed. - macOS: Go to
System Preferences>Sound>Inputand select your desired input device. Adjust the input volume.
- Windows: Go to
Step 3: Configure Your Audio Recording Software
- Launch Your Software: Open Audacity, GarageBand, or your chosen recording application.
- Select Input Device: Crucially, tell your software which audio input to record from. In Audacity, this is usually found in the “Audio Setup” toolbar (look for the microphone icon). Select your computer’s line-in or USB converter.
- Set Recording Channels: Choose “Stereo” for the best quality.
- Prepare for Recording: In Audacity, you’ll typically see a “Record” button (red circle) and a “Stop” button (yellow square). Before hitting record, perform a test: play a few seconds of your tape and watch the input level meters in your software. Adjust the input volume on your computer or cassette player to ensure the meters peak in the yellow/orange range, avoiding the red (which indicates distortion).
Step 4: Record the Audio
- Start Recording: Click the “Record” button in your software.
- Start Playback: Immediately press “Play” on your cassette player.
- Monitor the Recording: Watch the waveform appearing in your software. Ensure there are no gaps or sudden loud noises.
- Let it Play: Allow the entire side of the tape to play through. If you’re recording a full album or a long interview, you might need to flip the tape to the other side.
- Stop Recording: Once the audio is finished, click the “Stop” button in your software. Press “Stop” on your cassette player as well.
Step 5: Edit and Save Your MP3 File
- Listen and Trim: Play back your recording in the software. You can now select and delete any unwanted silence at the beginning or end, as well as any accidental noises or pauses.
- Noise Reduction (Optional): If your tapes have hiss or background noise, most audio software (like Audacity) has tools to help reduce it. Be careful not to overdo this, as it can degrade the original audio quality.
- Normalize Volume (Optional): The “Normalize” function can bring the overall volume of your recording up to a consistent level.
- Export as MP3: This is the final step!
- In Audacity: Go to
File>Export>Export as MP3. - Choose your desired MP3 quality settings (e.g., 192 kbps or 320 kbps for good quality).
- Select a location on your computer to save the file, give it a descriptive name (e.g., “Summer Vacation 1995 – Side A”), and click “Save.”
- In Audacity: Go to
Congratulations! You’ve successfully converted your audio tape to an MP3 file!
Tips for the Best Results
- Clean Your Tapes and Player: Dust and grime can affect playback quality. Gently clean your cassette player’s heads and rollers.
- Use High-Quality Cables: Cheap cables can introduce interference or signal loss.
- Record at the Highest Quality: When exporting, choose a high bitrate (e.g., 256 kbps or 320 kbps) for the best sound fidelity.
- Save Frequently: If you’re working with long recordings, save your project periodically within the audio software.
- Consider Professional Services: If you have a large collection of tapes, valuable recordings, or lack the time or equipment, professional tape to MP3 converter services are an option. However, for most users, the DIY method is cost-effective and rewarding.
Bridging the Gap: From Cassette Tape to Computer
The process of taking your cassette tape to computer is more than just a technical task; it’s a journey back in time. By following these steps, you’re not just creating digital files; you’re safeguarding your memories, making them accessible for future listening, and ensuring that the voices and music of the past can continue to be heard in the digital present.
Don’t let your precious audio recordings fade away. Start your tape to MP3 converter project today and rediscover the sound of your history!
wow… I never knew cassettes still existed!