Is Color Drenching Still Trending? Here’s What to Know
9 min read
1642 words
You probably remember the accent wall phase. For years, the standard move was to paint three walls a neutral off white and pick one “bold” wall to be the star of the show. It was a safe way to try colour without fully committing. But in 2026, designers and homeowners are moving beyond that halfway point. We are seeing growing interest in color drenching, a decorating technique that turns an entire room into one cohesive colour story.
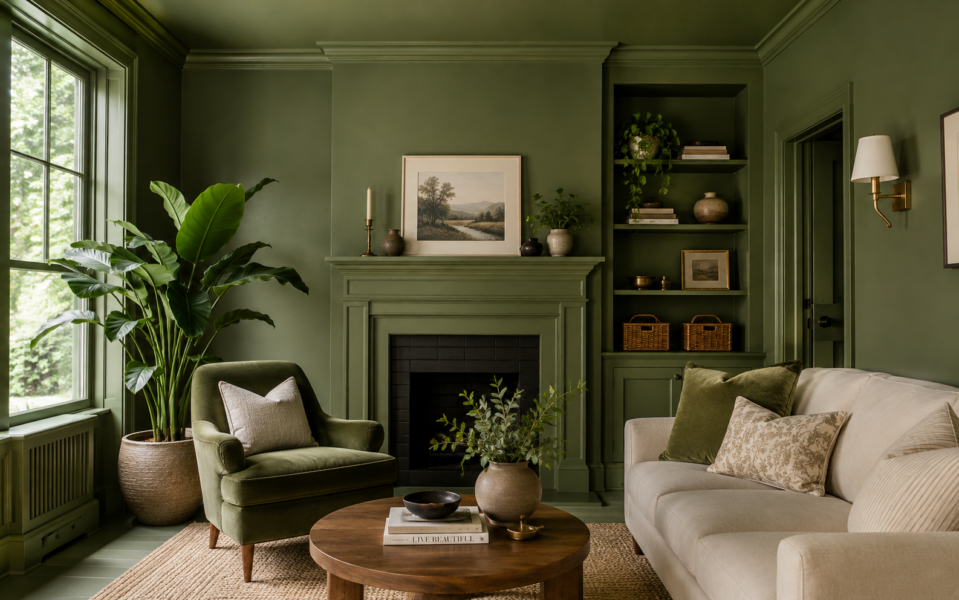
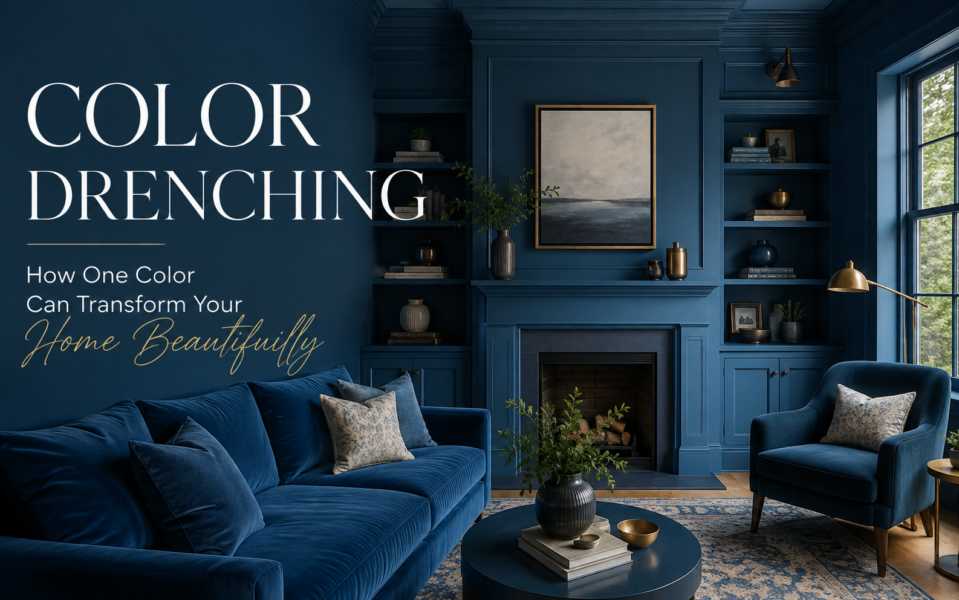
Color drenching is a decorating method where you paint almost every surface in a room the same colour or in closely related shades. This isn’t just about the walls. The colour can extend to the baseboards, window frames, doors, built ins and, most importantly, the ceiling.
When you walk into a room painted this way, the edges of the room seem to disappear. In a traditional room, your eyes stop at the white line where the wall meets the ceiling. That white line acts like a frame, telling your brain exactly where the room ends. By removing those visual borders, color drenching makes a space feel immersive. It’s like stepping into a pool of colour rather than simply looking at a painted surface.
Is Color Drenching Still Trending
Yes, but the way people are using color drenching is evolving.
While dark, moody rooms helped make the look especially popular, homeowners are also embracing softer greens, warm neutrals, muted blues, earthy browns and dusty pinks.
Rather than treating color drenching as a short lived social media trend, many designers now use it as a decorating technique that can work with different styles. The colour can be dramatic or subtle depending on the room, lighting and furniture.
The biggest change is that homeowners are becoming more comfortable experimenting with the entire room instead of simply painting one wall.
The 2026 Evolution: Color Capping and Layered Colour
If you are worried that painting a whole room one colour will feel like living inside a crayon box, you aren’t alone. This is one reason designers are experimenting with variations of the color drenching look.
One example is color capping. Instead of covering the entire room in one shade, you might paint the lower portion of the walls a deeper colour and use a lighter version above it, extending the lighter shade onto the ceiling.
This keeps some of the immersive quality of color drenching while introducing more contrast and visual breathing room.
Another approach is material drenching. Instead of relying entirely on paint, you can repeat a similar colour through curtains, furniture, rugs and accessories. This creates a monochromatic look that relies on texture to keep the room interesting.
For example, a matte blue wall paired with a velvet sofa, patterned curtains and accessories in related shades can create depth without introducing a completely different colour.
We are also seeing more high contrast pairings. A room can remain largely drenched in one colour while a single piece of furniture or accessory provides a dramatic pop. Imagine a deep navy room with a bright orange chair or a warm brown space with a colourful piece of artwork.
Best Rooms for Color Drenching
Not every room has to be drenched in colour. In fact, starting with a smaller or more contained space can make the trend easier to experiment with.
Bedrooms
A bedroom is one of the easiest places to try color drenching. Soft greens, warm beige, dusty blue and deeper earthy shades can create a cozy, relaxing atmosphere.
Bathrooms
Bathrooms are ideal if you want to experiment with a bolder colour without committing to an entire living space. A rich green, blue or warm pink can make a small bathroom feel much more intentional.
Home Offices
Color drenching can work particularly well in a home office because it creates a cohesive backdrop without requiring a lot of decorative accessories.
Dining Rooms
A dramatic colour can make a dining room feel more sophisticated and inviting, especially when the ceiling, trim and doors are painted in the same colour family.
Hallways
Hallways can be difficult to decorate because there is often little room for furniture or accessories. Using one colour throughout the walls, trim and doors can make the space feel deliberately designed rather than overlooked.
Your Step by Step Color Drenching Plan
Ready to try it? Don’t just grab a roller and start. A successful color drenching project requires a bit more planning than a standard paint job.
Step 1: Test the Colour
Before you buy several gallons of paint, grab a sample. Paint a large piece of cardboard and move it around the room at different times of the day.
A colour that looks like a soft forest green at noon might look dramatically darker in the evening. Pay attention to the room’s natural and artificial lighting before making your final decision.
You should also consider the paint’s Light Reflectance Value, or LRV. Lower numbers absorb more light and create a darker, moodier look, while higher numbers reflect more light and generally feel brighter.
Step 2: Choose Your Sheens
Using different finishes is one of the easiest ways to make a one colour room look more interesting.
For walls, a matte or low sheen finish can provide a soft appearance while helping disguise minor imperfections.
For trim and doors, a satin or semi gloss finish is more durable and easier to clean. The subtle difference in sheen can also highlight architectural details without introducing another colour.
For ceilings, a flat finish can help minimize reflections.
Step 3: Prepare the Room
Good preparation can make a huge difference in the finished result.
Clean the surfaces, repair holes or cracks, remove dust and use drop cloths to protect your floors. Painter’s tape can still be useful around areas that are not being painted, even if the walls, trim and ceiling are all receiving the same colour.
Step 4: Don’t Forget the Small Details
To really make a room feel drenched, think beyond the obvious surfaces.
Standard white light switches and outlet covers can stand out against a deeply coloured wall. Consider paintable covers or options that coordinate with your colour scheme.
You should also consider built in shelves, doors, radiators and other architectural features. Painting these elements in the same colour can help them blend into the room.
Step 5: Plan Your Painting Order
If you are painting the ceiling, it generally makes sense to start there before moving down to the walls and trim.
A typical order might be:
- Ceiling
- Crown moulding
- Walls
- Doors and window trim
- Baseboards
Allow each surface to dry according to the paint manufacturer’s instructions before applying additional coats.
If you are painting a bathroom, choose a product specifically designed for areas exposed to moisture and follow the manufacturer’s recommendations.
Where People Trip Up With Color Drenching
The biggest mistake people make is losing their nerve halfway through. They paint the walls and trim but leave the ceiling white.
That can create a strong visual stopping point. If you want the full color drenching effect, extending the colour onto the ceiling is an important part of the look.
Lighting is another consideration. In a monochromatic room, the colour of your light bulbs can have a noticeable effect on how the paint looks.
Warm white bulbs around 2700K to 3000K generally create a warmer, more inviting atmosphere, while cooler bulbs can make some colours appear harsher or less natural.
Another mistake is choosing a colour without considering the furniture already in the room. Before committing to a dramatic shade, look at your flooring, sofa, curtains, artwork and other major pieces.
Frequently Asked Questions
Does Color Drenching Make a Room Look Smaller?
Not necessarily. By removing the high contrast between the walls, ceiling and trim, color drenching can make the boundaries of a room less obvious. This can create a more cohesive and sometimes more spacious feeling.
What Are the Best Colors for Color Drenching in 2026?
There is no single colour you have to choose. Earthy greens, warm browns, muted blues, dusty plums and warm neutrals are all worth considering.
The best choice depends on your personal style, natural lighting and the furniture already in the room.
Can I Use Color Drenching in an Open Concept Home?
It can be more challenging. Color drenching works particularly well in rooms with clear boundaries, such as bedrooms, bathrooms and offices.
If your living room flows directly into your kitchen and dining area, it can be harder to decide where the colour should stop. Starting with a contained room may be easier.
Should the Ceiling Be the Same Color as the Walls?
For traditional color drenching, yes. Painting the ceiling the same colour as the walls is one of the easiest ways to create the immersive effect.
However, you can also experiment with a lighter version of the wall colour if you prefer a softer look.
Is Color Drenching Going Out of Style?
It does not appear to be disappearing. Instead, the technique is becoming more flexible.
You do not have to paint every surface in exactly the same shade to embrace the idea. Color capping, layered shades, contrasting furniture and different textures allow you to create a version of the look that works for your home.
Final Thoughts
Color drenching is more than simply painting a room one colour. It changes the way the walls, ceiling, trim and architectural details work together.
While the trend has evolved beyond the dark, moody rooms that first attracted so much attention, the basic idea remains popular because it can make a room feel cohesive, intentional and surprisingly cozy.
Whether you choose a soft muted beige, earthy green, warm brown or daring navy, the key is choosing a colour you genuinely love.
And you don’t have to drench your entire home. Start with a bedroom, bathroom, hallway or home office and see how you feel about living surrounded by colour.