
5 min read
877 words
Let’s face it, Canadian winters are no joke. One minute you’re enjoying a crisp fall day in Toronto, the next you’re battling -30°C in Winnipeg while your furnace works overtime. And if you’ve ever felt that telltale brrr near your windows, you know you’re not just losing comfort—you’re losing hard-earned cash. Enter weatherstripping: a simple, affordable fix often touted as an energy-saving hero. But just how effective is it for your Canadian home? Let’s cut through the chill and get practical.
Why Drafty Windows Cost You More in Canada
In our uniquely variable climate—where freezing winters meet humid summers—air leakage is a massive energy drain. Natural Resources Canada (NRCan) estimates that air leakage accounts for 25–40% of a home’s heating and cooling costs. Those sneaky drafts around windows force your HVAC system to run longer and harder, spiking your Hydro Quebec, BC Hydro, or Enbridge bills. In provinces like Alberta or Nova Scotia, where energy prices fluctuate dramatically, even small leaks add up fast.
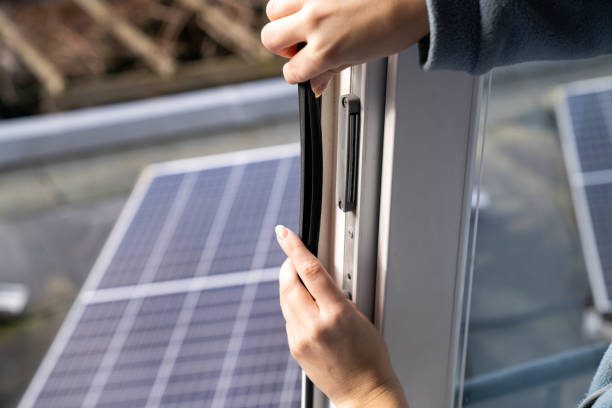
Weatherstripping seals gaps around movable window sashes (where the glass meets the frame), stopping cold air infiltration in winter and hot air intrusion in summer. Unlike replacing entire windows (a significant investment), it’s a targeted, budget-friendly solution. But does it actually move the needle on your energy costs?
The Proof: Weatherstripping’s Real Impact in Canadian Homes
Yes—when done right, weatherstripping significantly lowers energy costs. Here’s what the data shows:
- NRCan & CMHC Backed Savings: According to the Canadian Mortgage and Housing Corporation (CMHC), properly weatherstripping windows and doors can reduce air leakage by up to 30%. For the average Canadian home, this translates to 5–10% annual savings on heating and cooling costs. In a country where heating dominates energy budgets (especially in Quebec, Saskatchewan, and Atlantic Canada), that’s meaningful.
- Your Local Climate Matters: Homes in regions with longer, harsher winters (think Yukon, Manitoba, Northern Ontario) see the most dramatic savings. Sealing a drafty window in Calgary saves far more than in Victoria—simply because the temperature difference (and heating runtime) is greater.
- It’s About Comfort Too: Reduced drafts mean fewer “cold spots” near windows. Your thermostat doesn’t have to overcompensate, leading to more stable temperatures and lower runtime. You might not turn the heat up as high to feel comfortable—a direct cost saver.
Setting Realistic Expectations: What Weatherstripping Can’t Do
While highly effective for air leakage, weatherstripping isn’t a magic bullet:
- It won’t fix broken seals or damaged windows: If your double-pane unit is fogged, weatherstripping helps but won’t solve the core issue.
- It targets movable parts: It seals around the sash, not the entire window frame (where caulking is needed).
- Savings depend on current condition: A moderately drafty home saves more than a relatively tight one. Severely outdated windows might need replacement for maximum ROI.
The Takeaway for Canadian Homeowners: Weatherstripping is one of the highest-impact, lowest-cost energy upgrades you can do. It won’t replace deep retrofits, but it will deliver noticeable savings this winter—especially if your windows rattle in the wind or let in obvious drafts.
Getting the Best Results: Smart Weatherstripping for Canadian Winters
To maximize savings in our freeze-thaw cycles:
- Choose Canadian-Climate Materials: Avoid cheap foam tape that cracks below -10°C. Opt for:
- Vinyl V-Strip: Durable, flexible down to -40°C. Ideal for side channels.
- Silicone Rubber: Long-lasting sealant; handles extreme temps well (great for sashes).
- Magnetic Weatherstripping: Premium option for superior draft-blocking on older windows.
- Seal Strategically: Focus on the sash edges (top, bottom, sides) where movement happens. Don’t forget exterior doors!
- Timing is Key: Apply in spring or early fall when temperatures are mild (5–25°C)—adhesives bond best. Avoid icy or rainy days.
- DIY Done Right: Clean surfaces thoroughly with isopropyl alcohol first. Measure accurately. NRCan’s Office of Energy Efficiency offers free guides for Canadians.
The Cost vs. Reward Breakdown (It’s a No-Brainer!)
- Cost: $20–$100 per window (DIY with quality materials).
- Savings: $50–$200+ annually on energy bills, depending on home size, climate zone, and initial air leakage.
- Payback Period: Often less than one heating season—especially in colder provinces.
Plus, many Canadian provinces (like BC, Ontario, and Alberta) offer rebates through energy efficiency programs (e.g., Efficiency Nova Scotia, Enbridge Gas Save on Energy) that can cover part of the material cost. Check your local utility!
Final Thought: Small Step, Big Warmth
Weatherstripping isn’t glamorous, but for Canadian homeowners battling high energy costs, it’s pure common sense. It’s an accessible upgrade that directly addresses the air leakage draining your wallet—proven by CMHC, embraced by NRCan, and validated by thousands of draft-free homes across the country.
Don’t wait for the next polar vortex to feel how much you’re losing. Grab some quality weatherstripping this fall (before the deep freeze hits!), seal those gaps, and enjoy a noticeably cozier home and a lighter energy bill this winter. It’s one of the smartest, simplest steps you can take toward a more efficient Canadian home.
Feeling drafty? Check Natural Resources Canada’s free Energy Guide for Houses for more province-specific tips—and maybe give your windows a little love this weekend. Your wallet (and your toes) will thank you.