
7 min read
1382 words
Remember those textured ceilings that seemed to adorn every home in the ’80s and ’90s? Those fluffy, lumpy popcorn ceilings were once the height of interior design fashion. Today, however, they’re more often associated with dated aesthetics and a general feeling of “been there, done that.” If your own ceilings are sporting this once-popular texture, you might be wondering how to update your space and banish the bumpy. The good news is that removing or covering popcorn ceilings is a manageable project. Whether you’re a seasoned DIYer or prefer to call in the professionals, there are viable solutions to bring your ceilings into the 21st century. This post will explore your options, from tackling the removal yourself to exploring alternative texturing techniques.
The DIY Approach: To Scrape or Not to Scrape?
Many homeowners consider the DIY route for popcorn ceiling removal, and for good reason. It can be a cost-effective way to achieve a fresh look. The most common DIY method involves scraping the popcorn texture off. However, there are a few crucial considerations before you pick up a scraper.
1. Asbestos Check: This is the most important first step. Popcorn ceiling materials installed before the mid-1980s may contain asbestos, a hazardous material that can cause serious health problems when disturbed. If your home was built or renovated during this era, it is imperative to have your ceiling tested for asbestos by a certified professional before you begin any removal work. If asbestos is present, you will need to hire a licensed asbestos abatement company. Do not attempt to scrape it yourself.
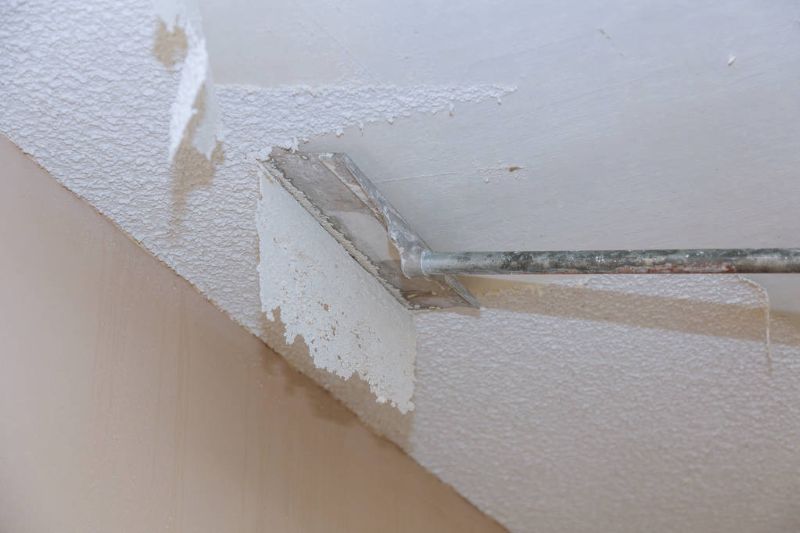
2. The Wetting Method: If your ceiling has been tested and confirmed to be asbestos-free, the scraping process typically involves wetting the popcorn texture first. This softens the material, making it easier to remove and minimizing airborne dust. You’ll want to protect your floors and furniture with ample drop cloths, as this can be a messy process. Using a garden sprayer filled with water (sometimes with a bit of dish soap added) is a popular method. Apply the water in sections, allowing it to soak in for about 15-20 minutes before gently scraping with a wide drywall knife or a specialized popcorn ceiling scraper. Work in small, manageable areas.
3. Tools of the Trade: Beyond a wetting agent and drop cloths, you’ll need a sturdy ladder, a good quality drywall knife (preferably one designed for ceiling texture removal, which often has a flexible blade), and plenty of trash bags for disposal. A dust mask is also highly recommended, even with the wetting method, to protect your lungs.
4. The Patch and Repair Phase: Once the popcorn is removed, you’ll likely be left with a less-than-perfect surface. You may find minor damage to the drywall, screw holes, or unevenness. This is where you’ll need to skim coat the ceiling with joint compound, sand it smooth, and potentially apply a primer before painting. This can be a labor-intensive part of the process, and achieving a perfectly smooth, seamless finish can be challenging for beginners.
5. Potential Pitfalls: Be prepared for the mess. Water can drip, and the popcorn material can be stubborn. It’s also easy to gouge the drywall underneath if you’re not careful with your scraping. Patience and thorough preparation are key to a successful DIY removal.
Alternative Textures: The Orange Peel Option
Not everyone wants a perfectly smooth ceiling. Sometimes, a subtle texture is preferred for aesthetic or practical reasons (it can help hide minor imperfections). If you’re looking to update your popcorn ceiling without going completely smooth, the orange peel texture is a popular and achievable alternative.
1. What is Orange Peel Texture? This spray-on texture creates a subtle, mottled finish that resembles the skin of an orange. It’s significantly less pronounced than popcorn texture, offering a more modern and less visually “heavy” appearance.
2. DIY Orange Peel Application: Applying orange peel texture is a project that can be tackled by many DIYers, often with more predictable results than full popcorn removal and smoothing. Here’s how it’s typically done:
- Preparation is Paramount: Just like with popcorn removal, thorough protection of your space is essential. Cover everything with drop cloths. Ensure the ceiling is clean, dry, and free of any loose debris. If you’re applying it over popcorn, a light sanding might be beneficial to knock down any particularly prominent peaks, but it’s not always necessary.
- The Magic Tool: A Hopper Gun: To achieve the orange peel effect, you’ll need a hopper spray gun. These tools attach to an air compressor and come with a hopper that holds the texture compound. You can rent these from most tool rental stores, or purchase one relatively inexpensively if you anticipate future projects. Different nozzle sizes on the hopper gun will affect the coarseness of the texture.
- The Right Mix: You’ll typically use a pre-mixed texture compound or mix your own according to the manufacturer’s instructions. The consistency is crucial – too thin and it will run, too thick and it won’t spray properly. Experiment on a piece of cardboard first to get the hang of it and dial in the right consistency and spray pattern.
- The Spraying Technique: Hold the hopper gun at a consistent distance from the ceiling (usually around 18-24 inches) and move your arm in a sweeping, overlapping motion. The goal is an even, consistent application. You’ll want to apply it in thin coats, allowing each coat to tack up slightly before applying the next, if needed, to build up the desired texture. Two thin coats are often better than one thick one.
- Finishing Touches: Once the texture is completely dry (check the product’s instructions for drying times), you’ll need to prime and paint the ceiling. A good quality primer is essential to ensure even paint absorption and coverage.
3. Professional Application: If the thought of using a hopper gun and dealing with spray texture makes you nervous, hiring a professional is a great option. Painters and drywall professionals are experienced in applying various textures, including orange peel. They have the right equipment, know-how, and can achieve a flawless finish efficiently.
When to Hire a Professional
While DIY projects can be rewarding, sometimes summoning the experts is the wisest course of action. Here are several scenarios where hiring a professional for popcorn ceiling removal or re-texturing makes sense:
- Asbestos Concerns: As mentioned earlier, if your ceiling contains asbestos, professional abatement is non-negotiable. This is a matter of health and safety.
- Lack of Time or Patience: Popcorn ceiling removal is often a time-consuming endeavor. Between preparation, the scraping itself, potential repairs, and finishing, it can take several days to complete. If you have a busy schedule or simply don’t enjoy tedious tasks, a professional can get the job done much faster.
- Desire for a Perfect Finish: Achieving a truly smooth, seamless ceiling after popcorn removal requires a skilled hand and experience with drywall finishing techniques. If your goal is a pristine, untextured ceiling and you’re not confident in your drywall mudding and sanding abilities, a professional will deliver superior results.
- Complex Ceiling Structures: If your ceilings are particularly high, have intricate angles, or feature architectural details, working on them can be more challenging and potentially dangerous. Professionals have the right equipment and experience to handle these situations safely.
- Apprehension about Mess and Disruption: Even with careful preparation, popcorn removal can be a messy, dusty affair. Professionals are adept at containing dust and debris, minimizing disruption to your home, and cleaning up thoroughly afterward.
- Applying New Textures: While orange peel is achievable for DIYers, other, more complex spray textures might be best left to the pros. Their expertise ensures an even, consistent application that looks intentional rather than accidental.
The Verdict: Out with the Old, In with the New
Popcorn ceilings served their purpose in a bygone era, but for most modern homes, their charm has faded. Whether you choose the satisfying challenge of DIY removal, opt for the more controlled application of an orange peel texture, or decide to entrust the job to experienced hands, updating your ceilings is a worthwhile investment. It can dramatically transform the feel of a room, making it brighter, more contemporary, and a space you’ll truly enjoy. So, take a deep breath, assess your options, and get ready to say goodbye to the bumpy and hello to a fresh new ceiling!