
7 min read
1255 words
The laundry room, often relegated to a forgotten corner or basement, is quietly one of the hardest-working spaces in any home. Far more than just a place to wash clothes, it’s a hub of activity that can significantly impact daily household efficiency. A well-designed, functional, and aesthetically pleasing laundry room can transform mundane chores into a more tolerable, even enjoyable, experience. It can also add significant value and appeal to your home.
Renovating your laundry room, however, requires careful planning, a clear vision, and a methodical approach. From optimizing space to selecting durable materials and ensuring proper ventilation, every detail counts. This comprehensive guide will walk you through the essential steps and considerations for renovating your laundry room, helping you create a space that’s both beautiful and highly functional.
1. Laying the Foundation: Strategic Planning
Before you pick up a single tool or browse a single tile sample, the most crucial phase of any renovation is meticulous planning. This involves defining your needs, setting a realistic budget, and conceptualizing the ideal design for your space.
Assessing Your Current Space and Desired Functionality
Begin by thoroughly evaluating your existing laundry room. What works, and what doesn’t? Is it cramped? Lacking storage? Poorly lit? Does it double as a mudroom, pet grooming station, or craft area? Understanding its current limitations and your desired multi-functional needs is key.
Consider:
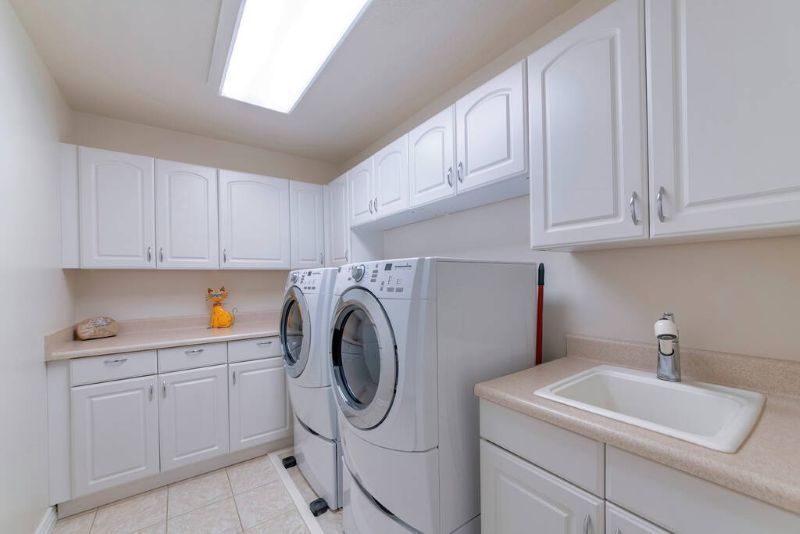
- Appliance Configuration: Do you want side-by-side washer and dryer, or stackable units to save space? Are you upgrading to larger capacity machines?
- Storage Needs: How much storage do you require for detergents, linens, out-of-season items, or cleaning supplies? Do you need open shelving, closed cabinets, or a mix?
- Work Surfaces: Is a folding counter essential? Do you need space for sorting clothes?
- Additional Features: Would a utility sink be beneficial for handwashing or soaking? Do you need a dedicated drying rack area, an ironing station, or even a pet washing shower?
- Ergonomics: How can the layout reduce bending and stretching? Consider pedestals for appliances or counter heights that suit your posture.
Budgeting and Sourcing Professionals
A realistic budget is paramount. Break down costs for:
- Demolition: If applicable.
- Plumbing and Electrical: Often the most significant hidden costs, especially if relocating hookups.
- Appliances: Factor in delivery and installation.
- Materials: Flooring, cabinetry, countertops, paint, lighting, sink, faucet.
- Labor: If hiring contractors for specific tasks (plumber, electrician, general contractor).
- Contingency: Always allocate 10-20% of your budget for unforeseen issues.
Decide early if this will be a DIY project or if you’ll enlist professional help. While some tasks like painting or installing shelving can be DIY, complex plumbing or electrical work should always be handled by licensed professionals for safety and code compliance. Obtain multiple quotes from reputable contractors and check references.
Design Elements and Layout Considerations
The design phase translates your functional needs into a tangible plan. Sketching out different layouts can help visualize the space.
- Layout Efficiency: Aim for a practical workflow. Can you easily move from sorting to washing, drying, folding, and storing?
- Space Optimization: Even small laundry rooms can be highly functional with smart design. Consider vertical storage, wall-mounted drying racks, or pull-out ironing boards.
- Lighting: Good lighting (both natural and artificial) is crucial. Recessed lighting, task lighting under cabinets, and even natural light from a window can make the space feel larger and more inviting.
- Ventilation: Proper ventilation is non-negotiable to prevent mold and mildew buildup, especially in a moisture-prone area. Ensure your dryer vent is clear and consider an exhaust fan if one isn’t already present.
- Aesthetics: Choose a color palette and materials that uplift the space. Durable, moisture-resistant materials are essential.
2. Bringing the Vision to Life: Execution Steps
Once your plans are solidified, it’s time to transform the space. This phase involves a series of sequential steps, ensuring each stage is completed correctly before moving to the next.
Demolition and Preparation
If you’re doing a complete overhaul, start with demolition. Safely disconnect and remove old appliances, cabinetry, and flooring. Importantly, always shut off water and electricity to the laundry area before beginning any demolition work. Protect adjacent areas from dust and debris. This is also the time to address any underlying issues like mold or water damage before building new. Ensure proper disposal of old materials.
Plumbing and Electrical Upgrades
This is often the most critical phase and where professional help is most valuable.
- Plumbing: If you’re relocating your washer/dryer hookups or adding a utility sink, a licensed plumber will ensure proper water supply lines, drainage, and vents are installed in their new locations, adhering to local codes.
- Electrical: An electrician can re-wire outlets, add new circuits for high-wattage appliances, install new lighting fixtures, and ensure all wiring meets safety standards. Ensure you have GFCI (Ground Fault Circuit Interrupter) outlets near any water sources.
- Ventilation: Install or replace the dryer vent, ensuring it’s a rigid, smooth metal duct for optimal airflow and fire safety, running directly to the exterior. An exhaust fan can be installed or upgraded at this stage.
Flooring, Cabinetry, and Countertop Installation
With the ‘bones’ of the room in place, you can move onto the finishes.
- Flooring: Choose water-resistant options like ceramic tile, porcelain tile, luxury vinyl plank (LVP), or sheet vinyl. These materials are durable, easy to clean, and withstand moisture. Install flooring before cabinets for a cleaner look and easier appliance installation.
- Cabinetry: Install upper and lower cabinets. Consider moisture-resistant materials for cabinets, especially if they’re close to a sink or washer. Wall-mounted drying racks or built-in ironing boards can also be installed during this phase.
- Countertops: Install countertops over base cabinets and around your utility sink. Durable and moisture-resistant options like laminate, quartz, or solid surface are excellent choices for a laundry room, providing a functional folding or work surface.
3. The Finishing Touches: Style and Organization
The final stages bring your vision to life, focusing on functionality, aesthetics, and smart storage solutions.
Appliance Installation and Hook-ups
Carefully move and install your new washer and dryer. Connect water lines, drain hoses, and electrical cords. Ensure the dryer vent is securely connected and free of kinks. If you have stacking units, ensure they are properly secured and leveled. Test all appliances immediately to check for leaks or operational issues.
Adding Smart Storage Solutions
Beyond cabinetry, integrate solutions that enhance functionality:
- Vertical Storage: Utilize wall space with open shelving, pegboards, or tall pantry cabinets for cleaning supplies.
- Pull-out Hampers: Integrate hampers into cabinetry for discreet sorting.
- Built-in Drying Racks: Wall-mounted or pull-out drying racks save space.
- Ironing Station: A wall-mounted, fold-down ironing board or an integrated drawer ironing board can be a game-changer.
- Overhead Rods: Install a simple rod above the sink or between cabinets for hanging clothes straight from the dryer.
Aesthetic Enhancements and Final Details
These elements tie the room together and make it truly yours:
- Paint: Use a moisture-resistant or mildew-resistant paint, especially in humid climates, to protect walls.
- Backsplash: A tiled backsplash behind the sink or counter adds visual appeal and protects walls from splashes.
- Hardware and Fixtures: Choose cabinet pulls, a faucet, and light fixtures that complement your overall design aesthetic.
- Decor and Organization: Add decorative touches like plants, artwork, or stylish storage bins to personalize the space. Organize detergents, fabric softeners, and other supplies in attractive containers.
Renovating your laundry room is an investment that pays dividends in both convenience and home value. By meticulously planning, executing each step carefully, and focusing on both functionality and aesthetics, you can transform this often-overlooked space into a highly efficient, beautiful, and enjoyable part of your home.