
6 min read
1007 words
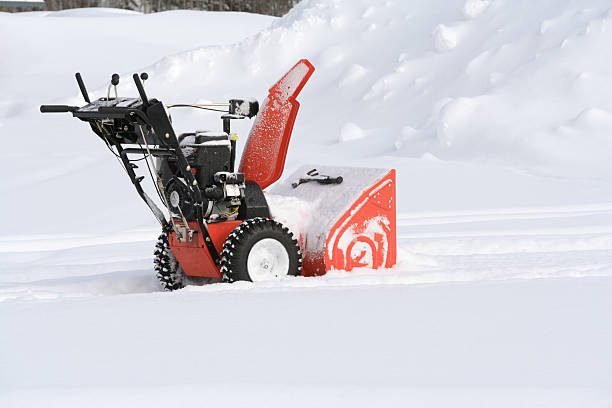
The air is getting crisp, the leaves are falling, and soon, a blanket of white will cover everything. The last thing you want when you wake up to a foot of fresh powder is a snowblower that refuses to start. A little preparation in the fall can save you a world of frustration (and back-breaking shoveling) later. Think of it as a small investment for winter peace of mind. Ready to make sure your machine is a first-pull hero? Let’s dive into our simple, step-by-step snowblower tune-up checklist.
Before You Begin: Safety First!
Before you touch a single bolt, let’s get set up for success and safety.
- Find a Good Workspace: Work in a well-ventilated area like an open garage or driveway.
- Disconnect the Spark Plug: This is the most important safety step. Simply pull the wire cap off the spark plug. This prevents any chance of the engine accidentally starting while you’re working on it.
- Gather Your Tools: You’ll likely need a socket/wrench set, pliers, a spark plug wrench, clean rags, and your snowblower’s owner’s manual.
The 7-Step Snowblower Readiness Checklist
Follow these steps, and your machine will be ready to tackle whatever winter throws its way.
Step 1: Handle the Fuel System (The #1 Culprit!)
Old gas is the leading cause of a snowblower not starting. Gas left over from last spring can go stale in as little as 30 days, creating gummy deposits that clog the carburetor.
- Drain the Old Fuel: If you have leftover gas in the tank, safely siphon it into an approved container.
- Add Fresh Fuel: Refill the tank with fresh gasoline. Check your manual, but most snowblowers use standard unleaded gasoline (87 octane).
- Use a Fuel Stabilizer: This is a pro tip! Adding a quality fuel stabilizer to your fresh gas prevents it from degrading, keeps your engine clean, and makes starting easier all season long.
Step 2: Change the Engine Oil
Just like your car, your snowblower’s small engine needs clean oil to run smoothly and last longer.
- Warm It Up (Optional but Recommended): Run the engine for a few minutes to warm the oil, which helps it drain more easily.
- Drain and Refill: Place a pan under the drain plug, remove the plug, and let the old, dark oil drain out completely. Replace the plug and refill with the specific type of oil recommended in your owner’s manual (usually 5W-30 synthetic for cold weather). Don’t overfill!
Step 3: Inspect the Spark Plug
The spark plug provides the spark that ignites the fuel. A dirty or faulty plug can mean a no-start situation.
- Remove and Inspect: Use a spark plug wrench to carefully remove the plug. Check for black carbon buildup, cracked porcelain, or a burnt electrode.
- Clean or Replace: If it’s just a little dirty, you can clean it with a wire brush. If it looks worn or damaged, replace it. They are inexpensive and a new one is a cheap guarantee for reliable starts.
Step 4: Check the Belts, Paddles, and Shear Pins
Now let’s look at the parts that do the heavy lifting.
- Inspect Belts: Check the auger and drive belts for cracks, fraying, or excessive wear. If they look worn out, now is the time to replace them—not during a storm.
- Check Auger Paddles: Look at the rubber or metal paddles/blades on your auger. If they are heavily worn down or chunked, they won’t clear snow effectively.
- Confirm Shear Pins: Shear pins (or shear bolts) are small pins designed to break if the auger hits something hard, protecting your engine’s gearbox from damage. Make sure they are intact and have a few spares on hand. You’ll be glad you did if you accidentally run over the morning paper.
Step 5: Check the Tires
Often overlooked, your tires are key to getting traction in the snow.
- Check Air Pressure: Use a simple tire gauge to ensure they are inflated to the PSI recommended in your manual. Proper inflation makes the machine much easier to handle.
- Look for Cracks: Check the sidewalls for any significant cracks or rot.
Step 6: Lubricate Moving Parts
A little lubrication goes a long way. Check your manual for specific points, but generally, you’ll want to lubricate the auger control and wheel axle shafts to ensure they move freely in freezing temperatures.
Step 7: The Final Test Run
You’ve done the work, now it’s time for the payoff.
- Reconnect the Spark Plug: Securely re-attach the wire cap.
- Start It Up! Move the snowblower outside, prime it, set the choke, and give it a pull. Let it run for a few minutes to circulate the new oil and fuel.
- Test the Controls: Engage the auger and the drive system. Make sure the chute rotates and deflects properly. Listen for any strange sounds.
Frequently Asked Questions (FAQ)
Q: When is the best time to get my snowblower ready? A: The ideal time is in the mid-to-late fall, well before the first snowfall is forecasted. This gives you plenty of time to order parts or schedule a service if you find a bigger issue.
Q: What kind of gas is best for a snowblower? A: Always check your manual first. Generally, standard 87-octane unleaded gasoline is fine. Avoid using gasoline with more than 10% ethanol (E10), as it can damage small engines over time.
Q: What if my snowblower still won’t start after doing all this? A: If you’ve gone through the checklist and it still won’t start, the issue might be a clogged carburetor. This is a common problem from old fuel. You can try cleaning it yourself if you’re comfortable, or this is a great time to bring it to a professional. [Link to: Contact Our Service Department]
You’re Ready for Winter!
Congratulations! By following this checklist, you’ve ensured your snowblower is primed and ready for duty. Now, when those first flakes start to fall, you can relax knowing your machine is ready to clear the way.
Need help with a tricky repair or don’t have the time? Contact a technician in your area for a professional snowblower tune-up.